一种 Obsidian vault 自动备份方法
Obsidian 笔记仓库的单元被称为 vault,官方提供了很多的备份的方法,包括:
- 利用 dropbox,iCloud,obsidian sync 之类的云服务
- 自建备份服务
云服务相对比较简单,只要在创建 Obsidia vault 指定到云服务的指定路径即可。这里我想介绍一种基于 Git 和 Github Private Repo 的自动备份方法。在使用这篇文章介绍的方法之前有几个前提假设:
- 了解 git 配置,包括
.gitconfig配置文件的修改、常用的 git 命令 - 了解 ssh 配置,包括
.ssh/config配置文件配置对应域名的公私钥 - 了解 github 配置,包括建立 private repo、配置 ssh 方式访问
以上对于程序员是基础技能,不过不要担心如果你不了解,在 Reference 中我会附上几个比较实用的链接,基本上碰到的问题都能解决,当然善用搜索引擎也是好办法之一。
准备
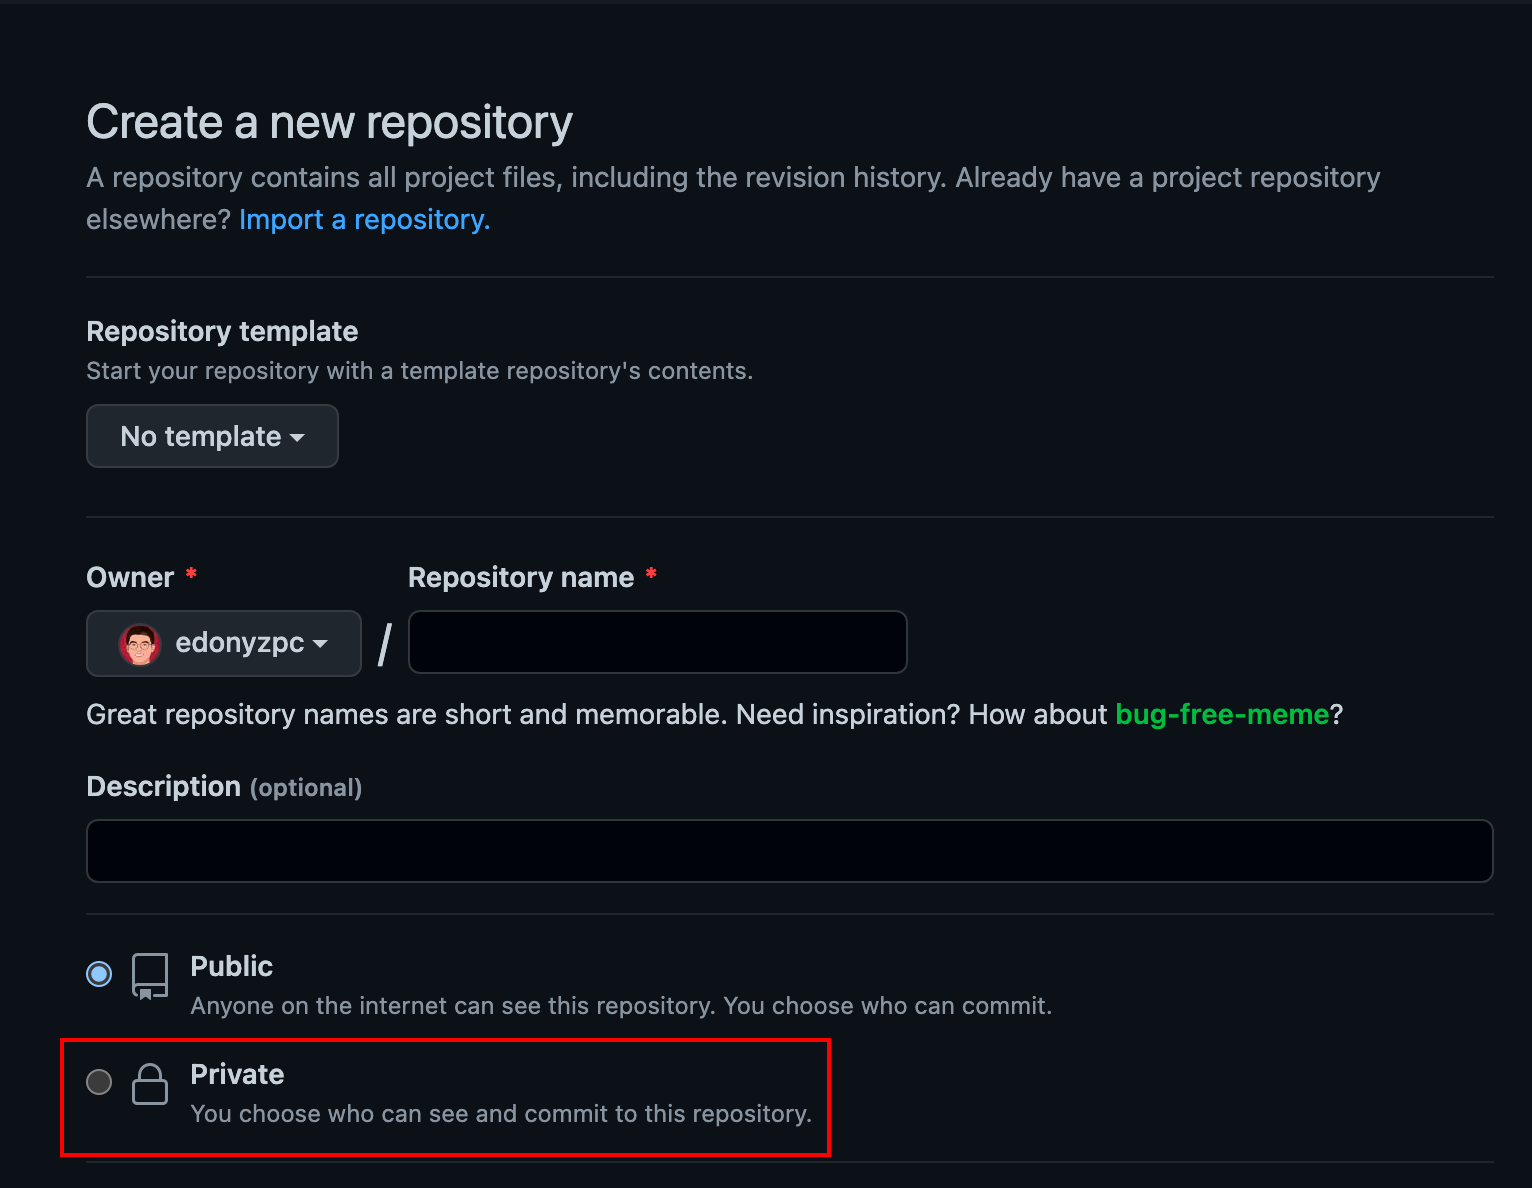
新建 Github Private Repo
在 Github 中新建自己的 Repo,需要注意的是将 Repo 设置成 Private。
Github SSH 配置
先在本地生成 ssh key,具体方法参考这个:Generating a new SSH key and adding it to the ssh-agent - GitHub Docs。
然后将生成的 ssh key 添加到 Github 账户中,具体方法参考这个:Adding a new SSH key to your GitHub account - GitHub Docs
Git SSH 配置
为本地 Git 配置上一步骤设置的 SSH key,具体是两个配置文件添加下述配置:
~/.gitconfig
[user]
	email = "your email"
	name = "your name"
# 下面按需配置
[commit]
	gpgsign = true
[alias]
	logs = log --show-signature
	cis = commit -S
[gpg]
	program = /usr/local/bin/gpg
[core]
	editor = vim
	quotePath = false
~/.ssh/config
Host github.com
	HostName github.com
	User git
	IdentityFile ~/.ssh/id_rsa_ob
	IdentitiesOnly yes
Obsidia vault 配置
在终端进行命令行操作,在 Obsidian 的 open another vault 中可以看到 vault 目录,进入 vault 所在的目录,例如:
cd /Users/edonymurphy/Library/Mobile Documents/iCloud~md~obsidian/Documents/anthelion/
Git 初始化
进入 vault 目录之后,将该 vault 初始化为 Git Repo:
cd /Users/edonymurphy/Library/Mobile Documents/iCloud~md~obsidian/Documents/anthelion/
git init
关联 Github Private Repo
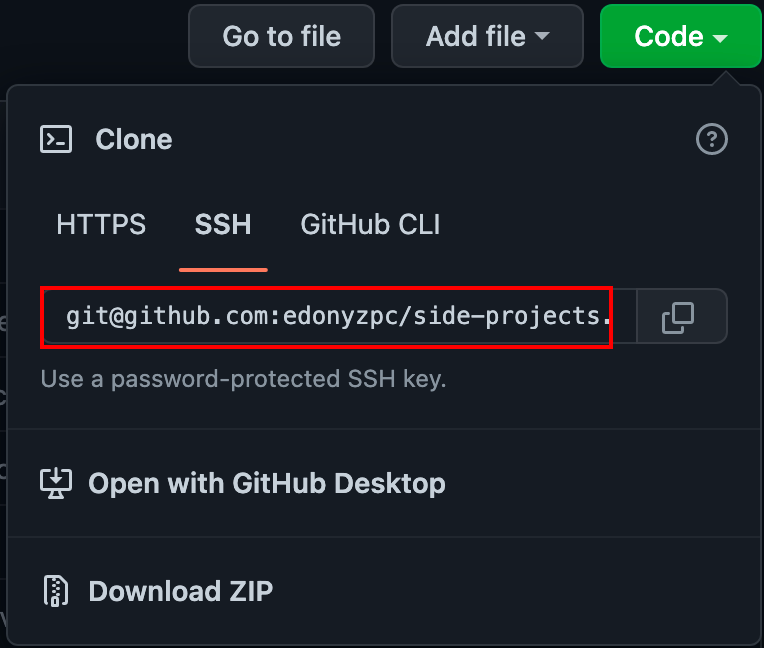
初始化 Git Repo 完成之后,需要将之前建立的 Github Private Repo 进行关联:
git add remote [email protected]/{your-name}/{private-repo-name}.git
上述 git ssh url 可以在 Github Repo 的 Web 页面上找到:
关联本地分支
添加远程分支之后,vault 跟 Github Repo 就关联上了,这个时候可以进行分支关联:
git add .
git commit -s "init commit"
git push -u origin master
Obsidian git 配置
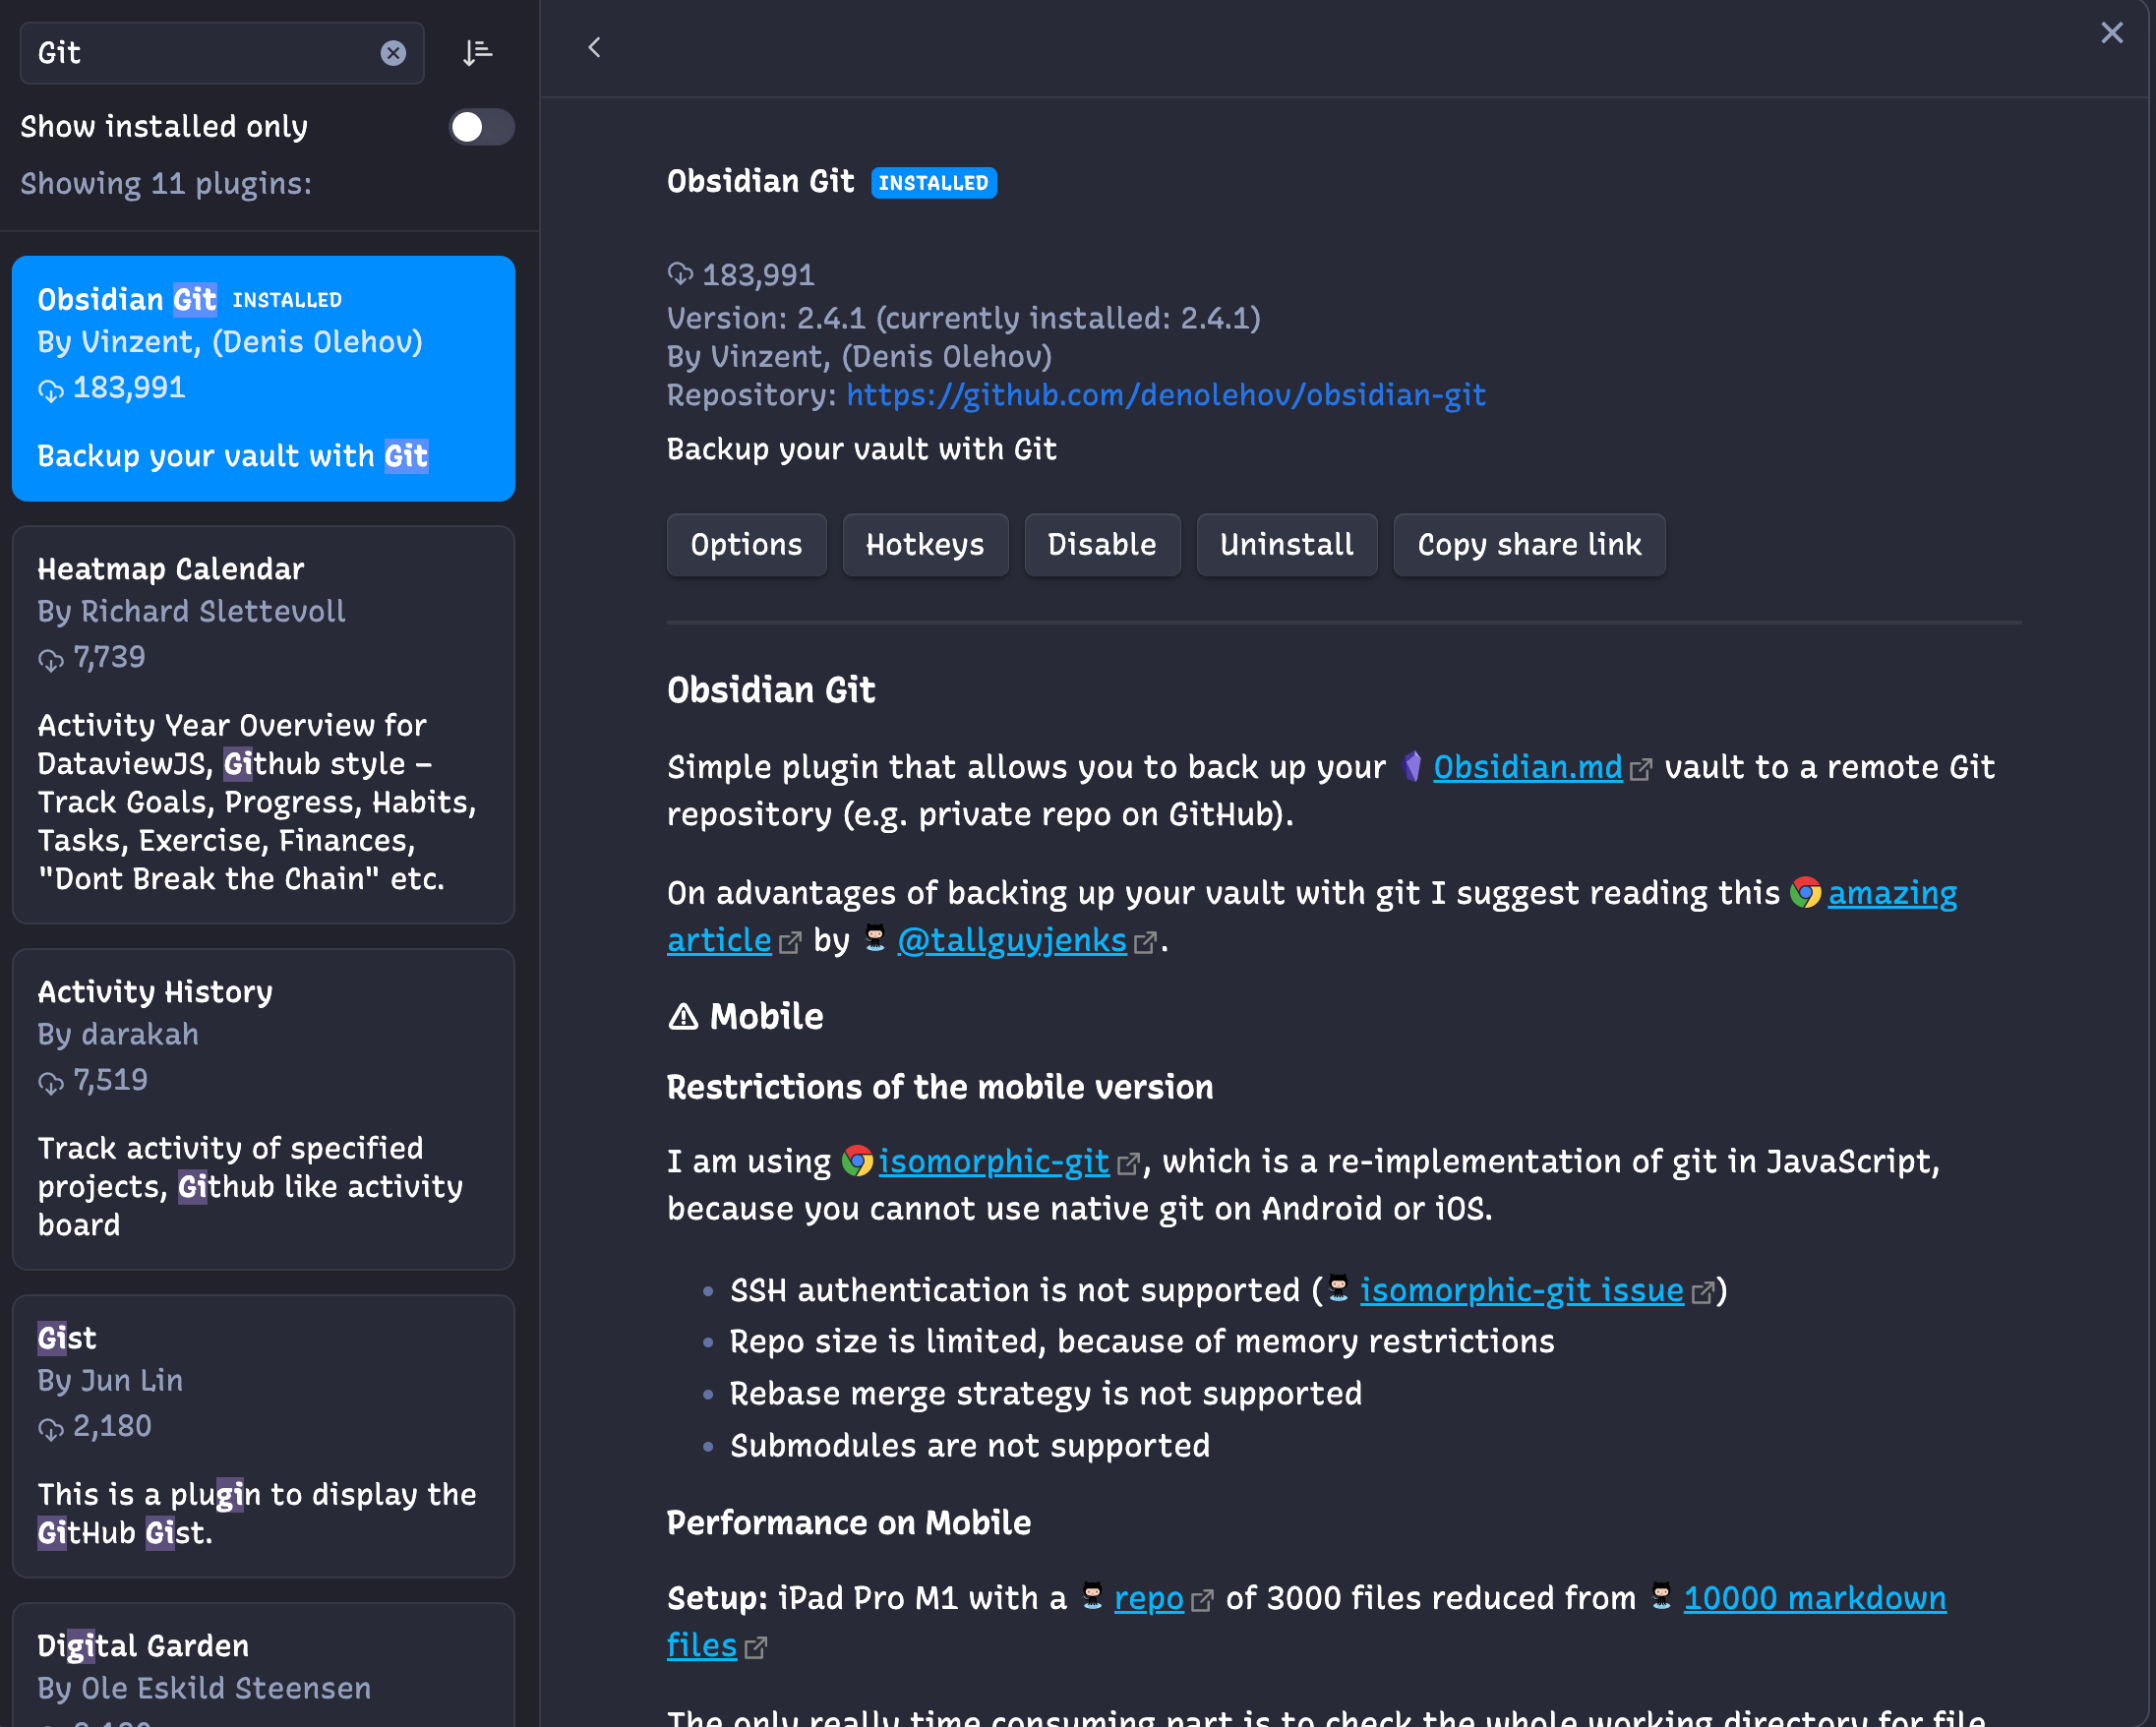
插件安装
在 Obsidian 中安装插件 Obsidian Git,如下图所示:
插件配置
按照自己的需要进行备份周期之类的配置,可以参考 Obsidian Git 的配置面板:
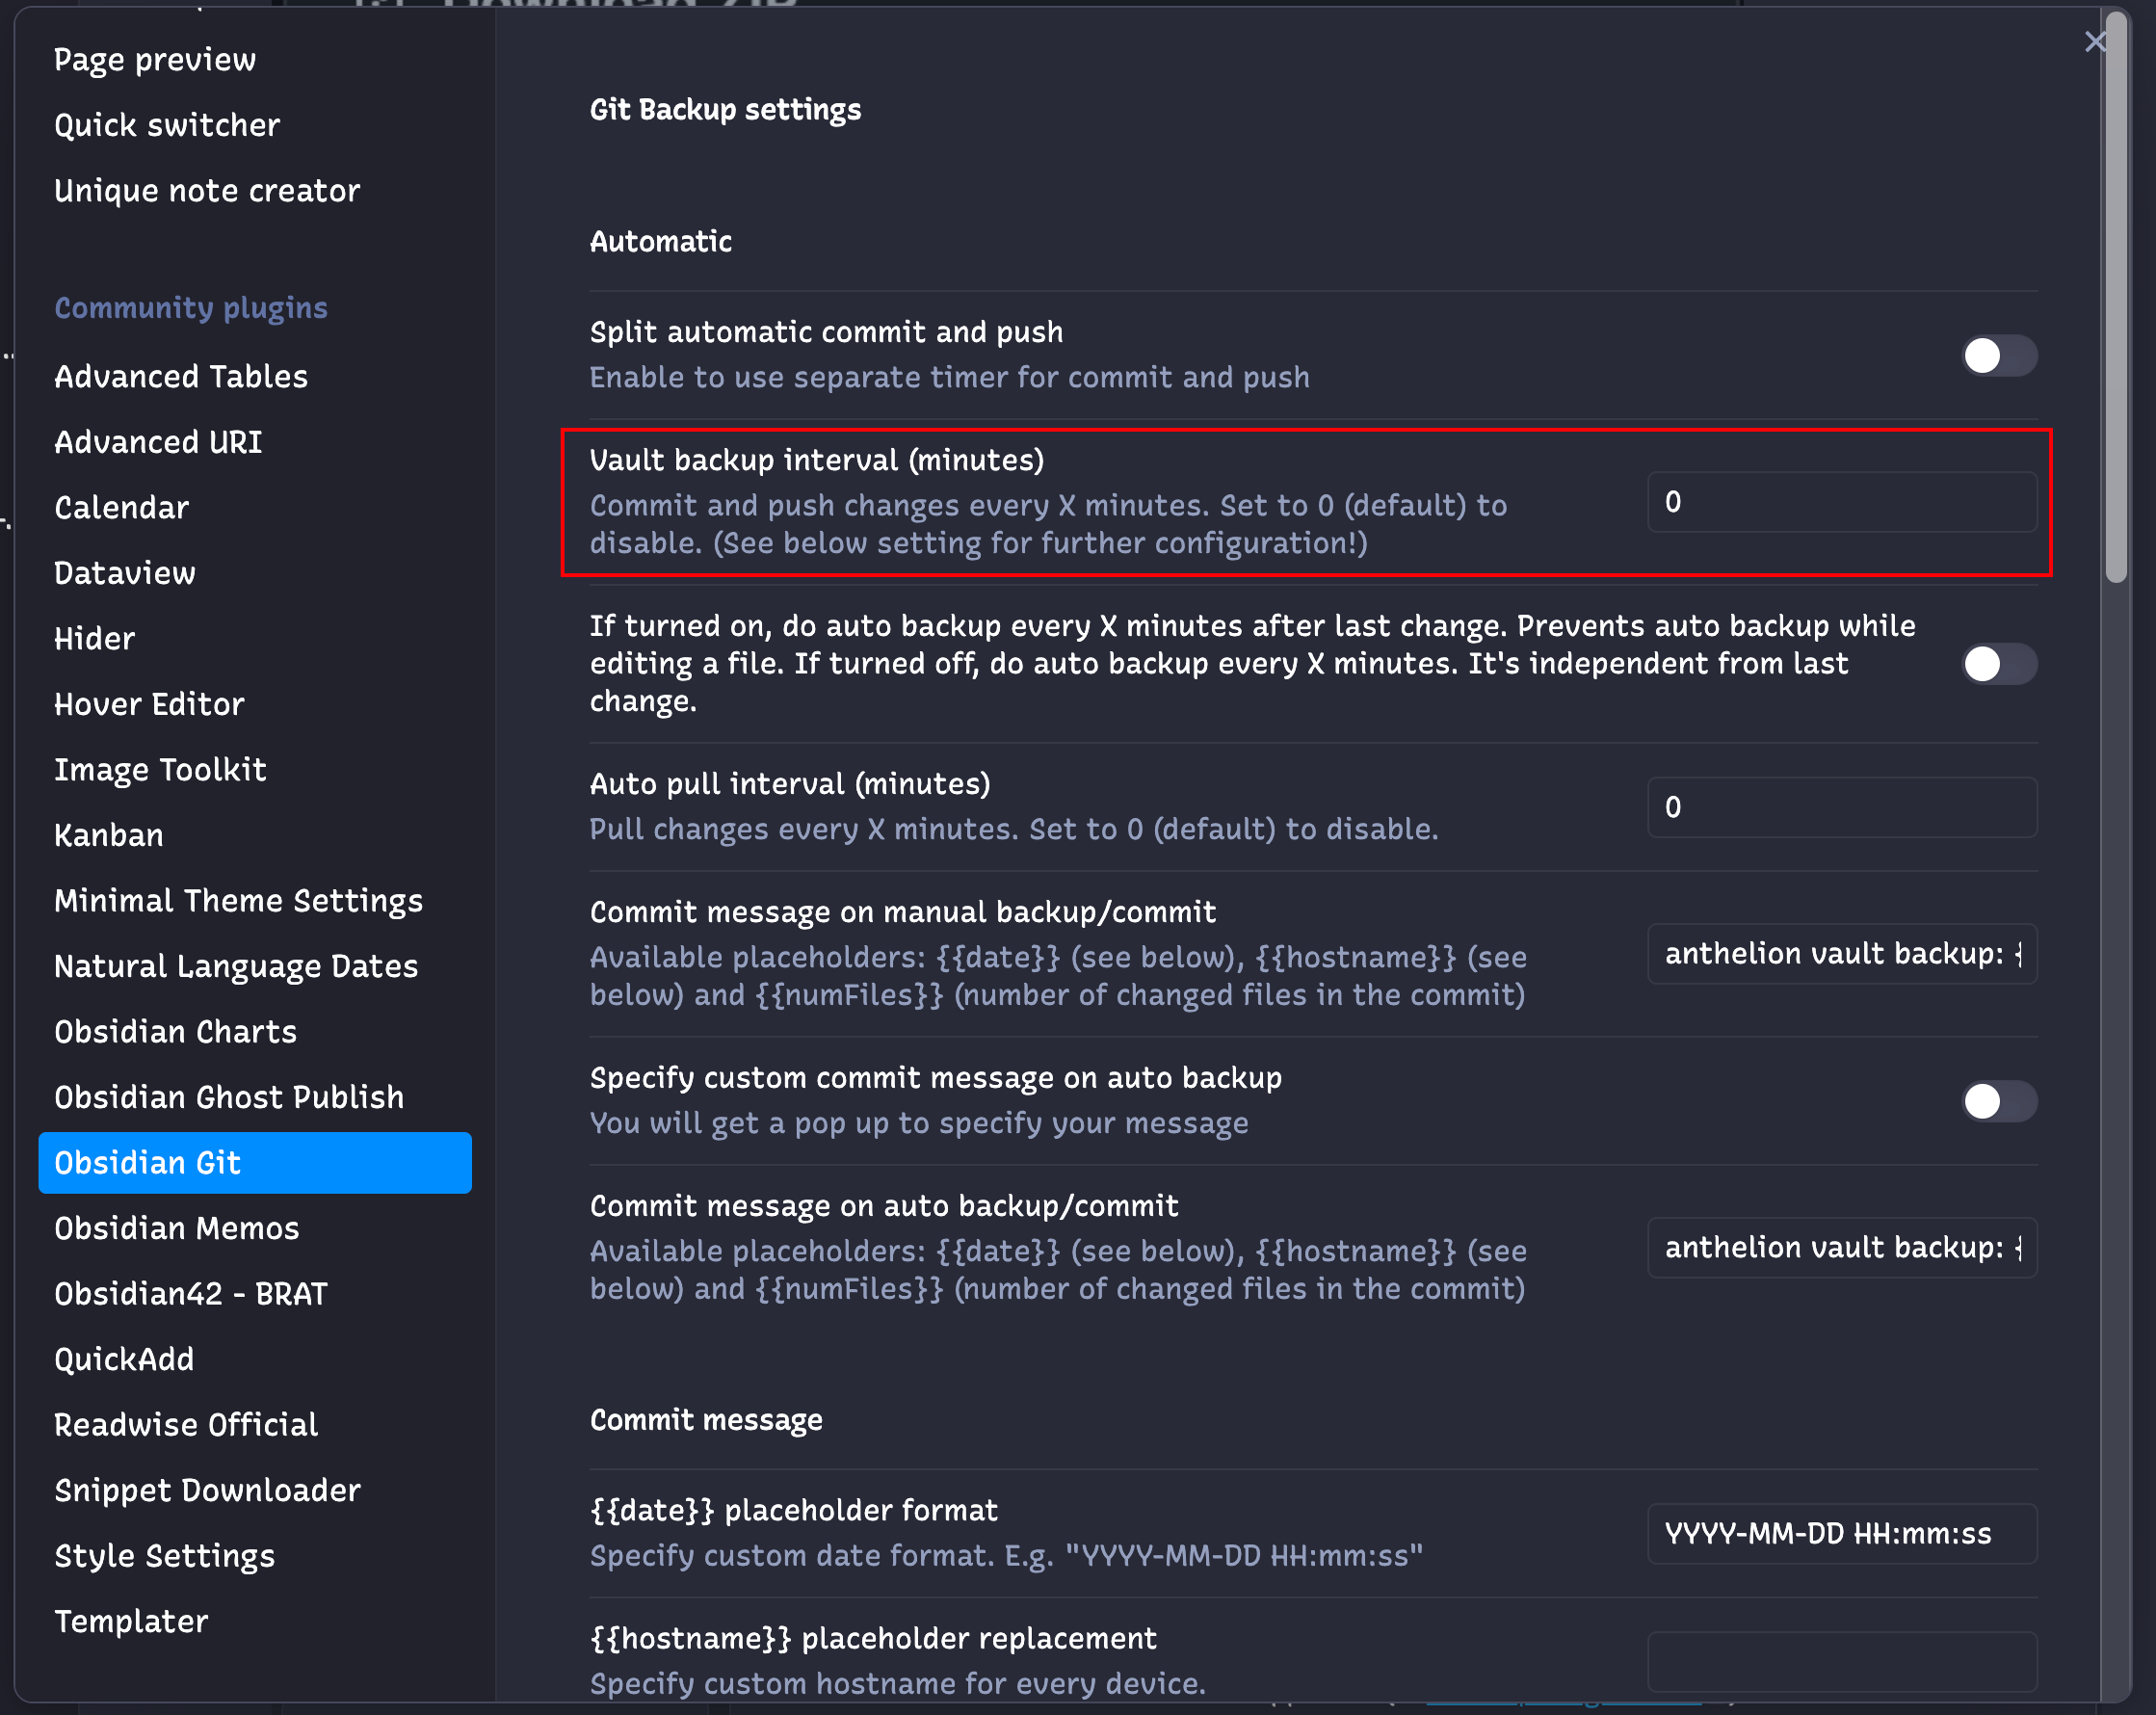
这是我在用的 Obsidian Git 的配置文件(仅供参考):
{
  "commitMessage": "anthelion vault backup: {{date}}",
  "autoCommitMessage": "anthelion vault backup: {{date}}",
  "commitDateFormat": "YYYY-MM-DD HH:mm:ss",
  "autoSaveInterval": 0,
  "autoPushInterval": 0,
  "autoPullInterval": 0,
  "autoPullOnBoot": false,
  "disablePush": false,
  "pullBeforePush": true,
  "disablePopups": false,
  "listChangedFilesInMessageBody": true,
  "showStatusBar": true,
  "updateSubmodules": false,
  "syncMethod": "merge",
  "customMessageOnAutoBackup": false,
  "autoBackupAfterFileChange": false,
  "treeStructure": false,
  "refreshSourceControl": true,
  "basePath": "",
  "differentIntervalCommitAndPush": false,
  "changedFilesInStatusBar": true,
  "username": "",
  "showedMobileNotice": true
}
总结
以上基于 Github 的 Obsidian 自动备份方法就配置好了,关于数据备份和安全有几点我想说:
- 不要完全依赖某一个备份服务,多几个备份总会稳妥(热备份、冷备份都用上是最好的),例如 Git + Dropbox,Obsidian Sync + Git 等
- Github Repo 虽然是 Private Repo 但还是有被人看到的风险,所以私密的东西,如 key、token 这类的最好还是不要往 Github 传
- 搭建 NAS 确实是个不错的方法,但是使用成本和维护成本对个人确实比较高,看你有没有人力、物力去折腾